
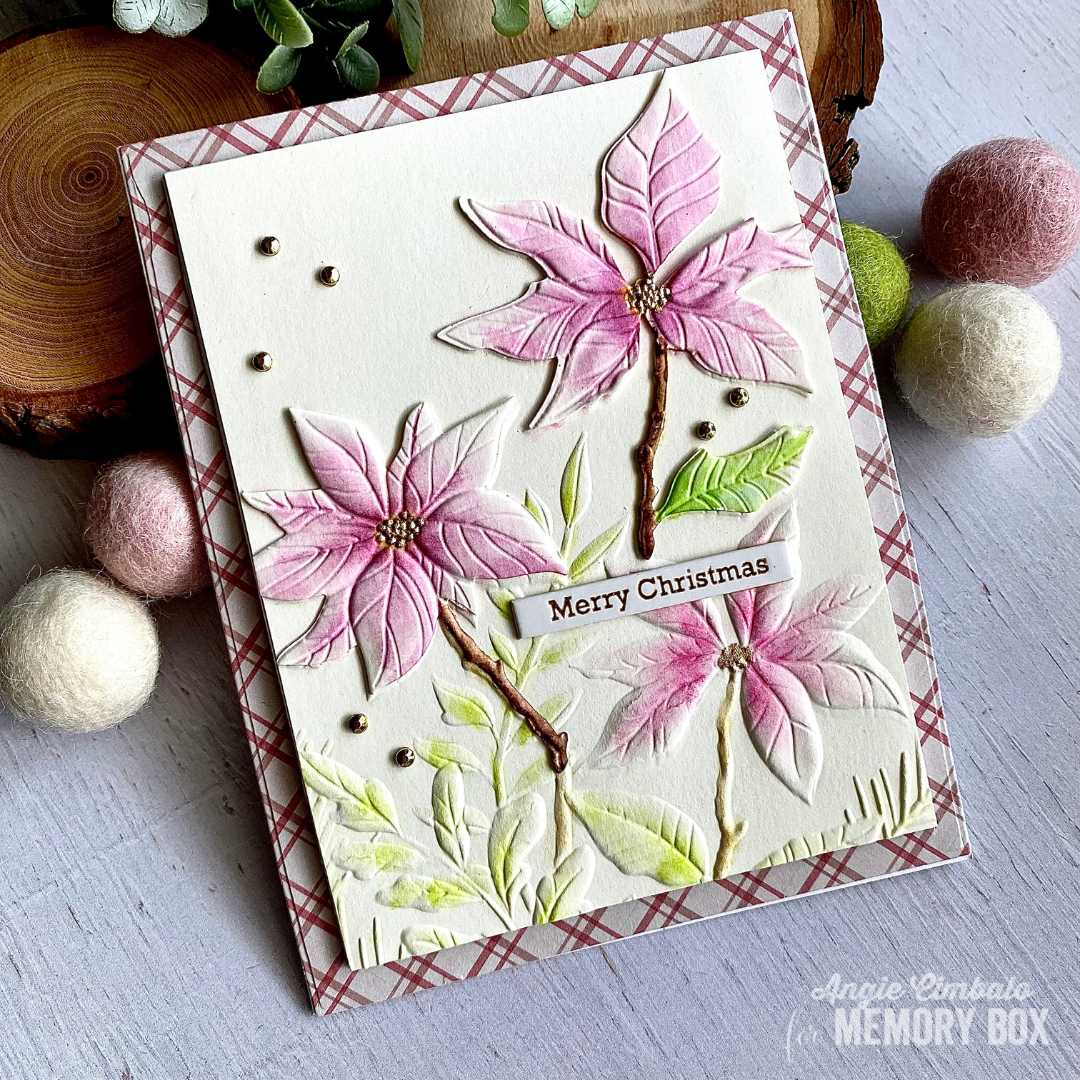
Hello and welcome, it's Angie here today with a 3D embossed Christmas card in pinks and greens.
Supplies: https://ldli.co/e/3omrm2d
For my card I used the new "Poinsettia Plaid" paper pack, the "A2 Rectangle Frames Die" set, a new "Foil Greeting White Tab," plus the new "3D Perfect Poinsettias embossing folder with dies".
Here's a closer look:

This embossing folder also coordinates with the newly released "Poinsettia Rub-Ons" if you don't have time to color the images. Today I chose to use ink blending tools, mostly small pencils to color the larger embossed images, and watercoloring with Zigs on the smaller die cut flowers.
I cut and embossed 2 of the individual poinsettia with the coordinating dies from the embossing folder set and watercolored them first. Then after they dried, I put them back in the folder to re-emboss for a deep impression. I trimmed down the main panel which was embossed on watercolor card to 3.75" X 5". For the main panel I used my finger daubers and blending stick pencils with green, brown and pink inks.
Using the A2 Rectangle frame dies I cut 4 extra from the 2nd largest in the set to put behind my watercolored panel for dimension, then I used the largest to cut the plaid frame from the new Poinsettia Plaid paper pack. Once I had put them together, and adhered the plaid panel to my card base, I added the top 2 individual watercolored poinsettia die cuts to the top of the ones on the main panel for dimension. Lastly I added some gold jewels from the Christmas Jewels pack.
Here's one last look:

I hope you like my card for today! I had a lot of fun creating it. Be sure to come back each day for more inspiration from the design team.

So pretty Angie
ReplyDeleteYou have colored those flowers perfectly. This is just stunning, Angie. AND you have used that plaid once again. You never disappoint. ;-)
ReplyDelete