Hello and welcome! There's a brand new trend challenge at Just Us Girls Challenge hosted by Sue and here is the trend she has chosen:
Oh boy, no-line watercoloring is a nightmare to me! But don't let my fears scare you away - keep reading!
That's why it's called a challenge, right? It helps you step outside your comfort zone...but alas, I found another way!
I have made one card with no-line watercoloring and it took me hours and hours to complete and I didn't even like the outcome. Haha! I even made a video of the making of that card HERE.
So in order to not repeat that experience, I searched the web for any other way to achieve this technique. I will not lie, I actually thought about doing some smooshing on watercolor paper because technically that is "no line watercoloring" and if I hadn't found this video by Melanie Muenchinger showing a way to achieve a "faux no-line watercoloring" technique, you would be looking at a lovely smooshed watercolored inked card today! Thank you Melanie!
(So if you are as intimidated as I am of no-line watercoloring, please just use smooshing technique with watercolors because there are no lines with that technique either! It will count for the challenge because it qualifies and fits the description perfectly!)
The technique Melanie showed in her video was to take regular copy paper and stamp an image in black on it and color it with alcohol markers on the stamped side, but actually use the back of your coloring for your card to give it the no-line look.
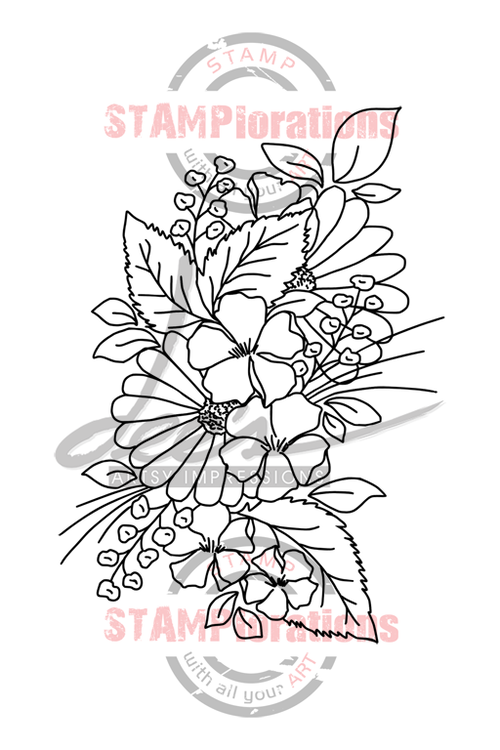
I decided to use a floral image from Stamplorations called #Blossom Spray #1.
Here's what I mean, look at the stamped image on the side I stamped and colored it:
And now look at that same piece of paper turned over with the alcohol inks that have bled through to the back giving it an artsy no-line watercolored look:
I actually like the front better even though I didn't add any white accents to it because I wasn't going to use that side. If I was going to use it, I would have added white gel pen and black dots also, like I did on the back.
To complete my card, I cut the image on copy paper with a Memory Box "Wrapped Stitched Rectangle" die and also cut a 2nd rectangle from white card stock, to mat it on because the copy paper was so see-through that the red and white checked patterned paper showed through!
Here's a close up look at the side I actually colored:
Here's one last look at my card for this week's JUGS challenge:
I hope you will have a chance to play along this week!
Be sure to stop by the blog to see the JUGS team designs along with our special November guest designer Joyce's beautiful creation! Thanks so much for stopping by!
 SP Blossom Sprays 1 Shop at: SP |
 MB Wrapped Stitched Rectangles Shop at: SSS |
 SSS Assorted Card Stock Shop at: SSS |
 Altenew Warm & Cozy Set Shop at: ALT |
 Altenew Green Fields Set Shop at: ALT |
 ALT Warm Gray Shop at: SSS |
 PFS Detail Black Shop at: SSS |
 ALT Red Sunset Markers Shop at: SSS |
 ALT Summer Afternoon Markers Shop at: SSS |
 Nuvo Deluxe Glue Shop at: SSS |
 TH Glass Media Mat Shop at: SSS |
 Sizzix Die Pick Shop at: SSS |
 Gemini Jr Shop at: SSS |


Wow! Great technique with amazing results! Your card is stunning!
ReplyDeleteWhat a neat way of doing no-line coloring, Angie. Your card is fabulous!
ReplyDeleteYou knocked my socks off Angie with the sheer beauty you achieved here. Love both takes. I have that stamp and you have done it proud. You rocked this weeks challenge for sure!
ReplyDeleteI am so glad I came by and read this post! You have enlightened me that is for sure! Way to stick with it and share your discovery with us all. They both are fabulous!!!
ReplyDeleteThis is stunning! Great job with the no line coloring
ReplyDeleteWhat a cool technique! This is drop dead gorgeous...both sides! Wow!
ReplyDelete